3d Printing Overhangs and Bridges
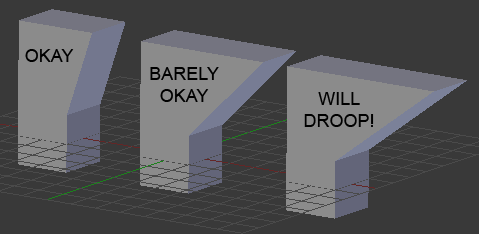
When you’re prepping a 3d model for printing, try to use the 45 degree rule. If your model doesn’t have any overhangs greater than 45 degrees anywhere on your model, you won’t have problems with drooping or dropped loops. But there are exceptions to the 45 degree rule. The most common is the bridge, where the plastic fills a gap in space between two points. With some design considerations and printer setting testing, you can print overhangs and bridges without relying on support structures that are annoying and time consuming to remove.
thingiverse example
By designing your model with the 45 degree rule in mind, you can help others print it more effectively. Instead of making square overhangs, give the model a beveled edge so it can effectively build to the side. Before sending your model to the slicer, look to see if there’s a way to rotate it in three dimensions that will keep all angles below 45 degrees. Many iphone cases can be printed vertically, but if you want to print cutout designs without support structures, they can be rotated flat so the cutout is lying on the print bed.
How to get around the 45 degree rule? By increasing the number of perimeters, each outer perimeter that would normally be floating can attach to the perimeter next to it. For this to work, your settings in slic3r or skeinforge must be well calibrated, as each perimeter needs to slightly overlap the previous.
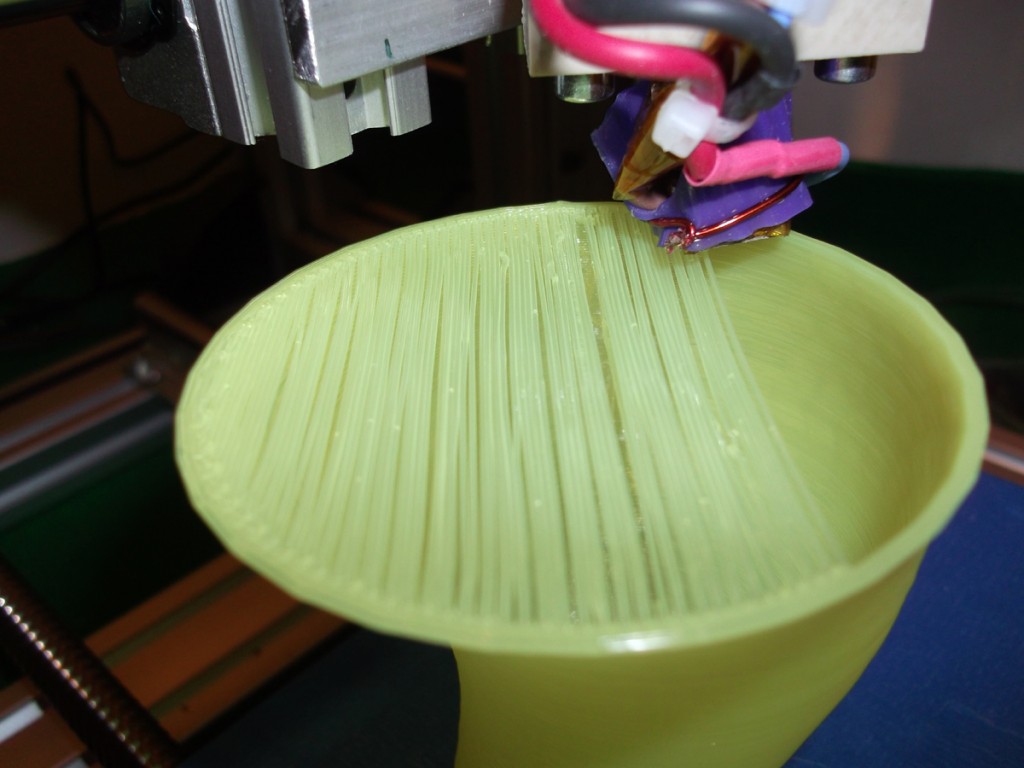
Another way to get around the rule is to print those areas at a different rate. You should experiment with your own printer settings to see what works. Many people find that slower rates for overhangs will let the filament cool better and solidify. Some people claim bridging should be done at higher rates, so that the entire structure can cool at the same rate with each end attached. Here you’ll have to do some experiments to see what works best for you. Once you’ve figured out all your settings, try this overhang test.
A fan attached to your print head helps even more with overhangs and bridges. But there’s a delicate balance. If you cool the filament too much, layers can have problems adhering to each other, making your model less structurally sound. You don’t want your fan on during the first layers, because your model needs to be firmly attached to the print bed. Once you’ve found what works for you, you can either modify your gcode to turn off and on the fan when needed, or watch the print and do it manually.
If all else fails, you can break your model into pieces that you can then glue together with standard glues, with an ABS slurry if printing in ABS, or with manually extruded plastic from your machine or a 3Doodler when they ship.